Introduction to AOSP


The Android Open Source Project is an open source development project managed by Google, and anyone is welcome to evaluate and add code and fixes to the source code.
Android System Architecture
Let's first talk about the layers of an Android device's architecture before delving into the build system and the source code.
- Application Layer
This layer includes built-in/system applications for direct end-user interaction. - Application Framework
This layer comprises of libraries that are created and run in the background, and are made accessible by Android interfaces, giving developers the API they need to create application's individual parts.
Some famous libraries present in an application framework are:
1) Activity Manager: Oversees the life-cycle of each application (activity).
2) Location Manager: Includes positioning services and geographic layers.
3) Package Manager: Responsible for application specific actions, involving installation, permissions, and so on.
4) Resource Manager: Provides the application the different resources it needs, including translated strings, images, layout files, color files, and so on.
5) Notification Manager: Allows the application to display personalised display prompt information in the status bar.
6) Telephony Manager: Controls all the mobile device features features, including the radio and SIM.
7) Windows Manager: Controls how windows operate, ensuring that each activity opens in a new window.
8) Content Providers: Enables data sharing between different applications.
9) View System: Creating crucial view elements for an application, such as inflating the layout and displaying views on the screen. - System Runtime Layer (Native)
This consists of 2 layers
1) C/C++ Libraries
They provide services through the applications framework.
2. Runtime Libraries
* Core Library
It provides most of the core library functions so that developers can use the language to write applications.
* Virtual Machines
Java Virtual Machine (JVM) is a virtual machine capable of executing Java bytecode regardless of the base platform. The Java bytecode can run on any machine capable of supporting JVM. The Java compiler converts .java files into class files (bytecode). The bytecode is passed to JVM, which compiles it into machine code for execution directly on the CPU.
Dalvik Virtual Machine (DVM) is a Java virtual machine developed and written by Dan Bornstein and others as a part of the Android mobile platform. Dalvik is a runtime for Android Operating System components and user applications.
It is a virtual machine optimised for Android devices. It optimises the virtual machine for memory, battery life and performance. It allows multiple instances of VM to run in limited memory simultaneously. Each application is executed as an independent Linux process.
- Hardware Abstraction Layer (HALs)
It is the interface between the Operating System Kernel and the hardware circuit to abstract or bring out the features of the hardware.
It is used to control hardware using syscalls orprocvalues created by the kernel.
It is generic and can be transplanted on various platforms. - Linux Kernel
Core system services depend or run on top of the Linux kernel.
Android specific drivers are added on the base Linux kernel source for these core services.
The system security, memory management, process management, network protocol stack and drivers models, etc.
Android Boot Process
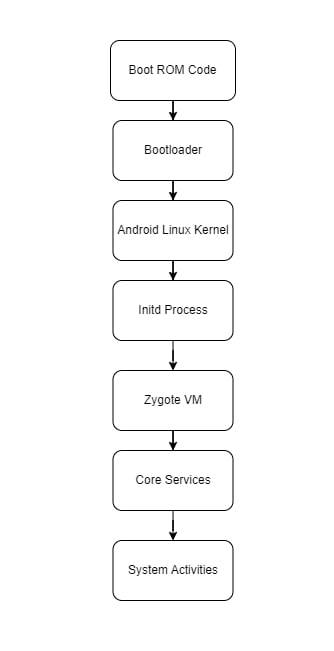
- The Boot ROM code starts executing from a pre-defined location which is hard-coded inside the ROM (chipset). It loads the bootloader into the RAM and starts executing.
- The bootloader runs in 2 stages:
1. It detects the external RAM and loads programs which helps in executing the second stage.
2. The bootloader sets up the network and memory, along with a basic environment to run the Linux kernel.
3. The bootloader is able to provide configuration parameters or inputs to the kernel for its specific purpose. - The Android Linux kernel is launched to set up cache and scheduling, loading of drivers, and so on. It then calls
/initwhich is the root of the very first process. initis responsible for setting up kernel mounts like/sys,/devand/proc. It then executesinit.rcto proceed for further processing.- Zygote is a virtual machine process that starts at system boot. It pre-loads and initializes core library classes, and enables code-sharing among the Dalvik VM.
- Zygote also launches system services. It forks new processes to launch the system services, some of which are:
1. Power manager
2. Activity Manager
3. Telephony registry
4. Package manager
5. Content manager - Zygote is also responsible for launching:
1. Status bar services
2. Hardware services
3. Connectivity services
4. Notification manager
Corner System of Android.
- Inter-Process Communication (IPC)
It is a framework for the exchange of signals and data across multiple processes. It is used for passing of messages, synchronisation, shared memory and Remote Procedure Calls (RPCs).
It enables information sharing, computational speed-up, modularity, convenience, privilege separation, data isolation and stability.
Processes in Android are isolated and have a separate address space. One process cannot directly access another process' memory;
however if a process wants to offer some useful services to another process in order to discover or interact with those services, IPC can be used. - Why the Binder?
The existing IPC mechanisms were not reliable enough.
Binder was a new IPC mechanism was introduced which abstracts the low-level details of IPC from the developer, allowing the applications to easily talk to both the system server and other remote service components. - How was it implemented?
As discussed before, a process cannot access another process' memory directly; however the kernel has control over all processes and can therefore expose an interface that enables IPC.
The/dev/binderdevice created by the binder kernel drivers is the central object of the framework and all IPC calls go through it.
The binder driver manages part of the address space of each process. The memory is real-only to the process, and all the writing is all done by the kernel.
When a process sends a message to another process, the kernel allocates some space in the destination process memory and copies the message data directly from the sender process. It then queues a message to the receiving process telling it where the received message is. The recipient can then access that message directly which happens in its own memory space.
Establishing a Build Environment
To build AOSP, a Linux build machine is recommended, with the following minimal specifications: ~16-cores, 32GB of RAM and around 300GB of free disk space, as per the AOSP docs.
To setup the Linux build environment , you can directly run this command on your linux machine with elevated permissions:
curl https://raw.githubusercontent.com/akhilnarang/scripts/master/setup/android_build_env.sh | sudo sh
Downloading the Source Code
We are going to build a Generic System Image, that is common to all devices. You can read more about GSI here.
You can choose a source code of your choice. The base generic source code is uploaded by Google at android.googlesource.com.
However, we also have LineageOS which is a fork of AOSP that also has generic image targets present (Credits to LineageOS developers).
- We are going to use the
repotool that was installed during the setup we did in order to sync the source code. - Check out the LineageOS manifest here to find the branch that you need to sync. Currently the generic targets for GSI are available in
lineage-18.1(based on android 11) and above. repo init -uhttps://github.com/LineageOS/android-b lineage-18.1repo sync- This will start downloading the source code, and if all goes well you will be able to see the directory structure after a successful source checkout.
Building the Source Code
Since we are selecting a generic target to build, let's move forward with building an arm64 GSI for AB-type partitioning.
To build the source code:
1. First of all we have to setup the AOSP build environment:
source build/envsetup.sh
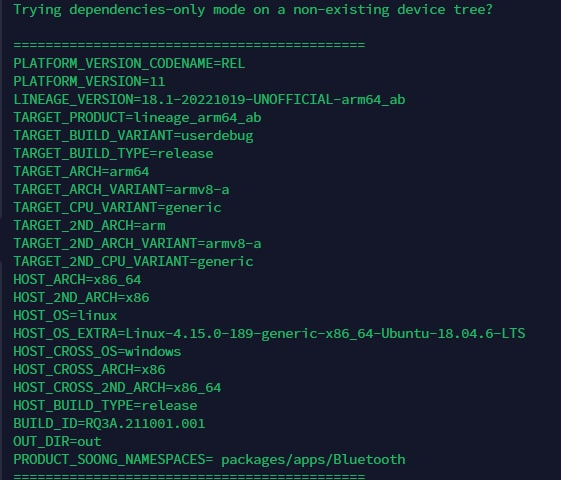
2. Then we have to lunch the required build target:
`lunch lineage_arm64_ab-userdebug`
Here lineage_arm64_ab is the product name and userdebug stands for user-debuggable. You can read more about the build types here.
3. Now start the build by just running make
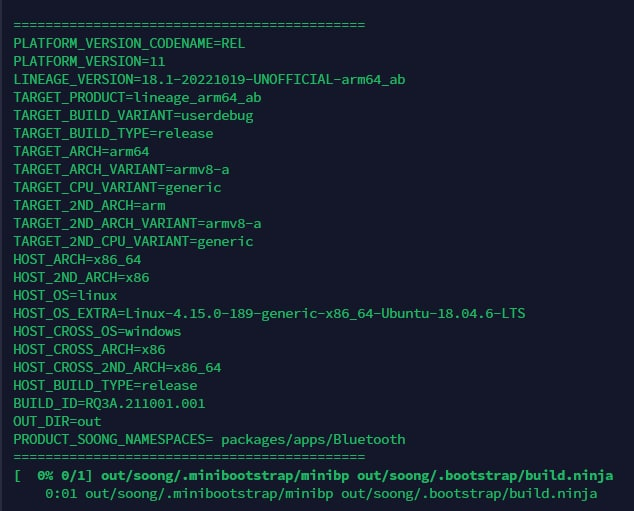
This will start the build and will take a few hours to complete. The build time totally depends on your machine configuration – it can take upto few minutes to even a day!
Emulating an Android Device
After a successful build, the emulator path is added to the build path and can be run using the command:emulator
After some time, you will be able to see a GUI interface that will boot the built images.
What's next?
After the Operating System has booted, you can enjoy the appearance of pure AOSP.
Some individuals could be unsure on what to do next. This is a normal question since it may have taken you some time to get here because utilising the AOSP build system is challenging and you may have made a common error. Once the OS has successfully booted, you can observe how a pure AOSP interface differs significantly from the UI on your Android smartphone.
This is typical since Original Design Manufacturers (ODMs) use this source code as the starting point for later modifications to create the UI you adore on your smartphones.
These ODMs improve the aesthetics of the AOSP framework, which handles UI management. These ODMs are also responsible for optimising the AOSP's base components in order to provide a better user experience. The ODMs work on components that are used to specify the sort of device we are utilising as well as add hardware functionality support to the source code; these components are sometimes referred to as a device tree.
The device configuration tree used by the AOSP build system contains board-specific changes like as partition sizes, feature flags, packages, configuration XMLs, properties, and so forth. These files are necessary for this generic source code to execute as reliably as or even more reliably than the device's stock Operating System. Many of these files are already included in the source code and are produced by ODMs. These files allow us to create our own device tree, which we can then use to successfully build using the build system and boot the device.
We also alter and employ these device trees in the creation of custom ROMs.
You can try writing or finding the device tree of your own device that has an unlocked bootloader after becoming familiar with the AOSP build system. At this point, you will face challenges like working with and booting the device's linux kernel or finding the configuration files that one requires. You can learn more about device trees and how to write one here.
You can attempt delving into the XMLs inside the framework/base portion of the source code and studying them in order to adjust the layouts of the SystemUI or the QS tiles, the Notifications, and so on. If you are interested in the frontend/UI just like MIUI or OneUI do it. AOSP has its own XML-style layout, which will take some time getting accustomed to, but you will soon understand it and build on it as needed.
There are other areas of the source code you can look into and learn more about, such the system libraries, core components, packages, and so forth (as mentioned in the architecture layers section).
After gaining a basic idea of what AOSP is and how it functions, in addition to the cornerstone, which is the most crucial component of Android, you may start working your way through it.
Let me know your experience with reading this blog at my email.