Dual booting Windows and Arch Linux
A guide to install Windows 11 and Arch Linux with dual-boot and custom boot partition size.

I use Arch Linux as my main operating system. Linux works very well, but sometimes you need that one tool which only works on Windows, and while Wine and the like work, the most reliable solution to this problem is to dual boot your machine with Windows and whatever Linux distribution you prefer.
In this guide, we'll first install Windows 11 with a custom sized boot partition, and then dual boot it with Arch Linux using the Grub bootloader.
Prerequisites
- A stable internet connection (around 6GB of data will be used)
- A USB drive or similar to create a bootable medium
- Basic knowledge of CLIs and a CLI text editor like
vimornano - It'll be helpful if you have some experience with installing Arch Linux before
If you get stuck at some part in this blog, you can always refer to the Arch Wiki or Google.
The images used in the blog are taken from Google Images along with my own system (after installation -- so they are not completely correct but it should give an idea of how things look like), I'll update them whenever I dual-boot again.
Pre-Installation
Getting Disk Images
We start by getting the disk images or ISOs for both the operating systems.
Prepare Installation Image
A bootable live USB is an external storage device that contains everything required to boot into a live environment/setup. There are multiple ways to create such a live environment; but here we'll do it the plain old way with a USB drive.
We'll be installing Windows first so we need a USB drive with the Windows environment. You can "flash" Windows to your USB drive using some software like Rufus or Balena Etcher.
Alternatively if you are on Linux you can use dd to create a bootable USB. Moreover, this arch guide explains other ways to create a bootable medium.
There's also Ventoy which can be used to create a bootable disk with multiple operating systems -- I personally use Ventoy since it's very efficient to be able to have multiple ISOs on the same drive at the same time.
Once you finish installing Windows, you can re-format the drive and flash the Arch ISO onto it to continue.
Installation
After getting the bootable USB ready, plug it into your computer and boot the system. While its booting up, you need to enter the Boot Menu. Common keys to enter boot menu are Esc, F2, F10 and F12, and you can refer to Google for the proper key for your laptop/PC. You need to press one of these while the system is booting up.
Windows 11
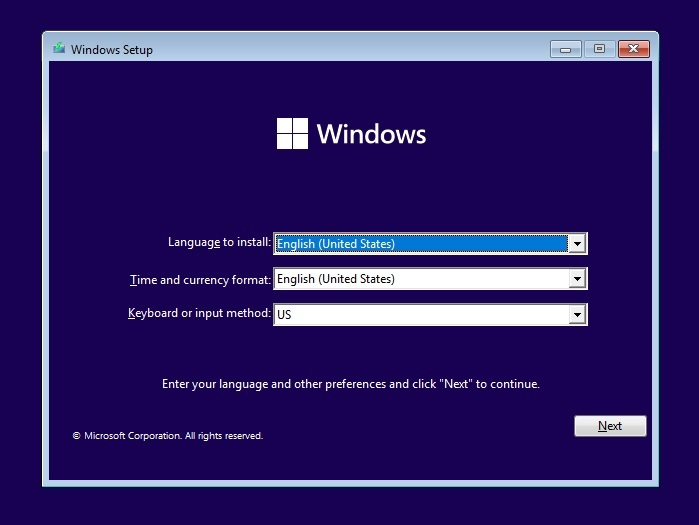
Once you are in boot menu, select the boot option corresponding to the USB drive, and it should start Windows Setup.
Select the appropriate language, time and keyboard options, and click on the "Next" button to continue with the installation. Then, insert a product key if you have one.
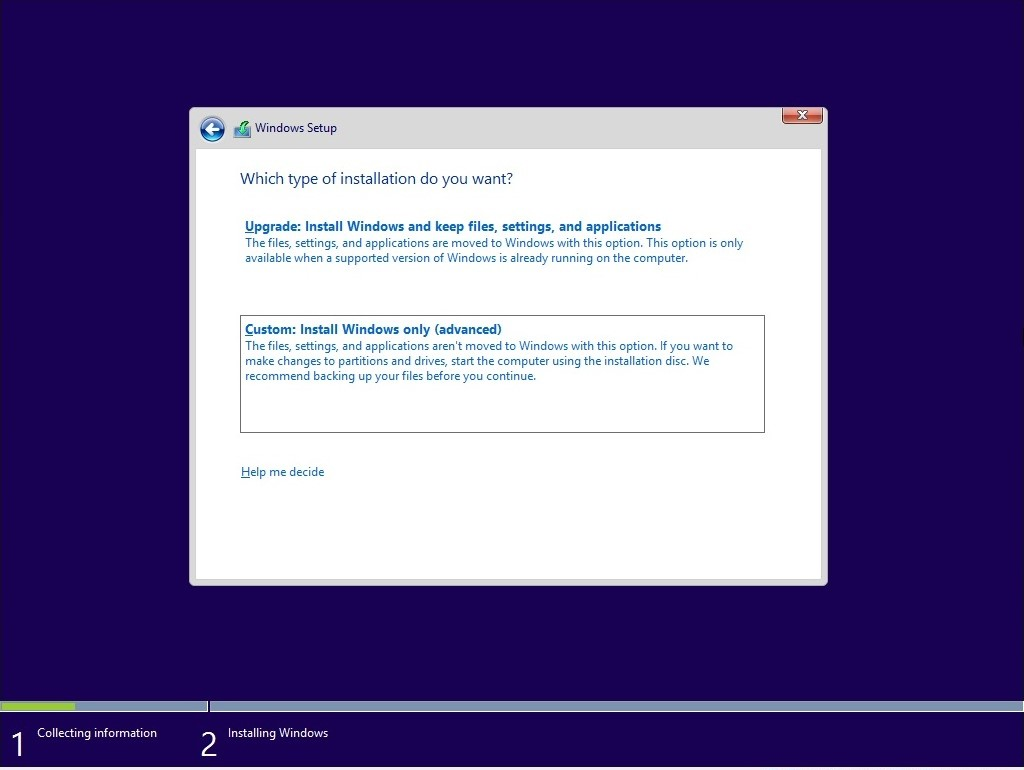
On this screen you want to select the option Custom: Install windows only (advanced) option to be able to format the disks as you wish.
You'll see a similar screen where Windows will show you the available drives and partitions. On this screen, you can delete and create partitions as you like.
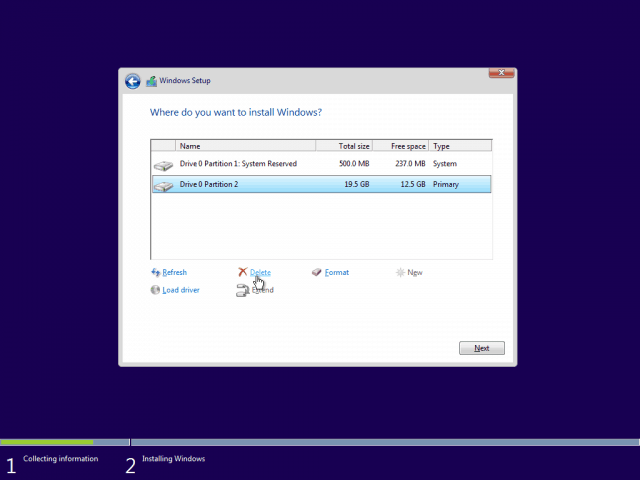
Windows creates 4 partitions:
- System - also known as boot partition or EFI System
- Windows reserved
- Recovery - Windows recovery environment
- Primary - the primary partition on which operating system is installed
(don't worry if you only see three partitions after creating primary partition, as one of the windows generated partition was hidden for me in the setup as well for some reason)
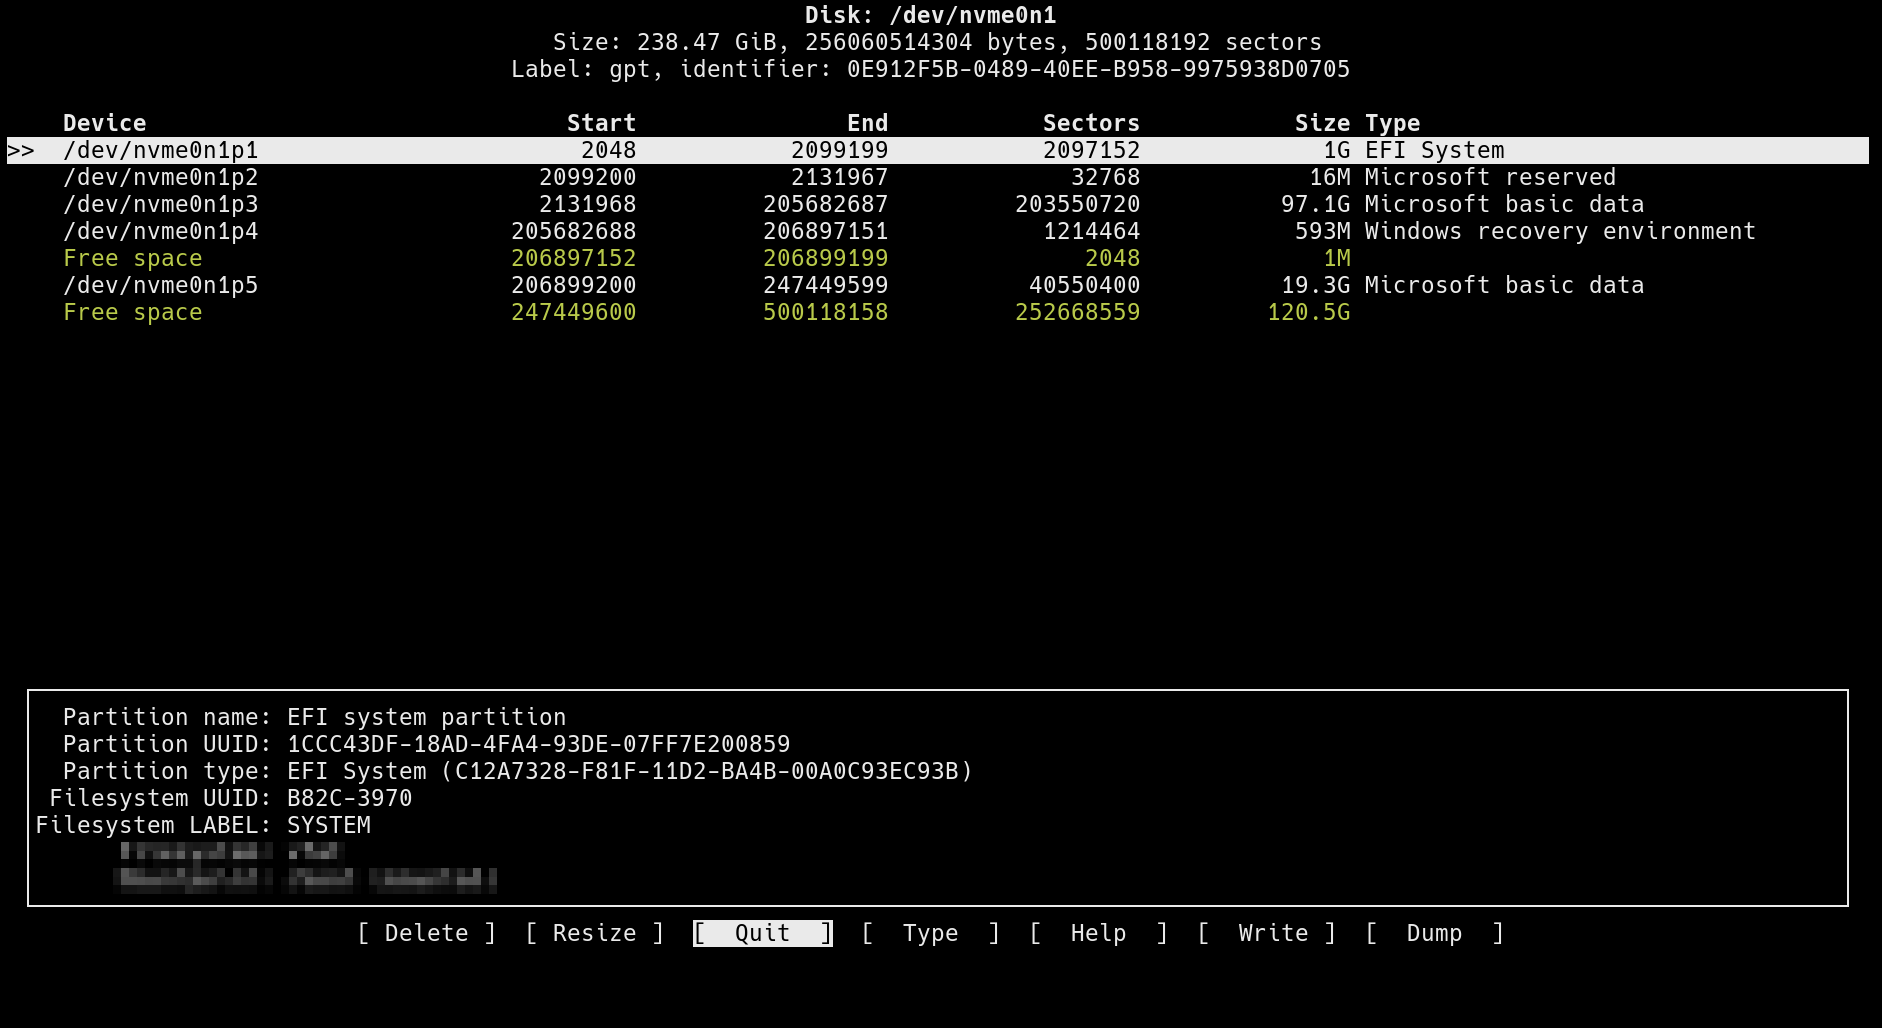
In my case, I have a 255GB SSD and would like to split it into four main parts:
- [EFI] System(1GB) - boot partition
- [WIN] C: Primary (100GB) for Windows 11
- [WIN] D: Data (20GB) for other files in Windows 11
- [ARCH] 120GB
The boot partition (EFI System Partition or ESP) contains the bootloader which is responsible for booting the system. When dual booting, we create a single boot partition and load the entries for both the operating systems in one bootloader so that it's easier to select the option we want.
When creating a primary partition in the Windows setup, Windows will create the 4 partitions mentioned above, one of them is System boot partition.
Windows usually generates the boot partition with a default size of 100 or 260 MiB, which is too small for multiple bootloaders.
It is suggested to make the boot partition atleast 500MiB for multiple bootloaders. We cannot customize the size of the boot partition once it's created in the Windows setup, so we'll manually create one using diskpart from the setup.
(Note: you'd want to play a little with the Windows setup to understand how it creates partitions in order to be able to understand it well. I assume you have a basic understanding of what partitions and mounting are, along with some other general filesystem related terms).
It's also very hard to increase the boot partition size after you have dual-booted the system, since it requires free space immediately succeeding the partition, which is usually not the case.
Let's start by deleting all the partitions in the setup window by clicking each partition and then pressing the delete button. Once done, the setup should only show Unallocated Space. We are now ready to create the boot partition manually:
- Press
Shift + F10to open the Command Prompt. - Type
diskpartand press Enter to open the disk partitioning tool. - Type
list diskto list the available disks and note the number in front of the disk on which you are installing Windows - Type
sel disk nwherenis the number you noted, re-check it and make sure it isn't the USB's number :)) - After selecting the correct disk, Type
create partition efi size=1000where 1000 is size of the System partition in Mebibytes(MiB) and pressEnter(you can keep it 500 if you want, I"ll go with 1000MiB). - Type
format quick fs=fat32 label=Systemand pressEnterto format the partition with FAT32 filesystem with the System label (used by Windows) - Type
exitto exit the partitioning tool andexitagain to exit the command prompt.
Yay, we have created ourselves a custom sized boot partition! Now press refresh button in the setup and it should show the partition we just created.
Now we have the System partition and unallocated space, you can have as many partitions for windows as you want according to your available storage, but make sure to keep at least 100GB unallocated space left for Arch Linux.
First create a new partition (which will be the primary partition, make sure to select appropriate size) and that should create the Primary partition with recovery partition. Notice how Windows detected the System partition and did not create a new one. Now create the other partitions or drives (D:, E:) if you want to, and continue with the setup on finishing installing Windows.
Arch Linux
After installing Windows and leaving space for the Linux root partition, flash the Arch ISO to your installation medium and boot into the USB from the boot menu like you did before.
Internet
Arch Linux downloads the required packages and base system for the installation, so we need to set up a network connection. Note that to test a connection, you can always use the command ping 8.8.8.8. To stop the command, press CTRL+C.
Ethernet
Plug the cable and test the connection.
WiFi
To connect to WiFi, you can use the iwd daemon. Steps to connect are:
- Type
iwdto enter the daemon prompt
$ iwd
[iwd]#
- For help, use the
helpcommand
[iwd]# help
- List the devices (interfaces) -- this will show the available wireless devices. In my case, it was
wlan0
[iwd]# device list
- Start the network scan (replace
with device name)
[iwd]# station <device> scan
- List the networks (note the SSID of the network you want to connect to)
[iwd]# station device get-networks
- Connect to the network. You will need to enter the passphrase/password after pressing
Enter.
[iwd]# station device connect SSID
Test the connection with the ping command as mentioned above.
Partitioning
[Warning: Be careful here, do not touch the Windows partitions]
In order to install a Linux system we need two main partitions:
- Boot (mounted on
/mnt/boot) - contains bootloader (we have already created this in Windows setup) - Root (mounted on
/mnt) - the Linux root (/) where everything is installed
There are many ways to partition the disks. Since we already have some unallocated space, we just need to create a data partition from it and format it. You can use fdisk or cfdisk for creating a partition.
Run lsblk to list the drives and partitions with their mountpoints, size and other information:
$ lsblk
NAME        MAJ:MIN RM   SIZE RO TYPE MOUNTPOINTS
nvme0n1     259:0    0 238.5G  0 disk
├─nvme0n1p1 259:1    0     1G  0 part
├─nvme0n1p2 259:2    0    16M  0 part
├─nvme0n1p3 259:3    0  97.1G  0 part
├─nvme0n1p4 259:4    0   593M  0 part
└─nvme0n1p5 259:5    0  19.3G  0 part
Here, I have a drive named nvme0n1, and then some partition names followed by it. You may have sda or something else as the drive name. The partitions are as follows -
- nvme01np1 - Boot partition
- nvme0n1p2 - Microsoft reserved
- nvme0n1p3 - Primary Windows Parittion (C: drive)
- nvme0n1p4 - Windows recovery environment
- nvme0n1p5 - Extra data partition for windows
Remember the boot partition name (nvme0n1p1in my case).
We don't see the unallocated space we left for Arch because we haven't created a partition from the unallocated space yet. To do that, type in cfdisk /dev/<drive_name>
$ cfdisk /dev/nvme0n1
This will open up cfdisk, which is an easy to use TUI application. Use up/down arrow keys to select the unallocated space.
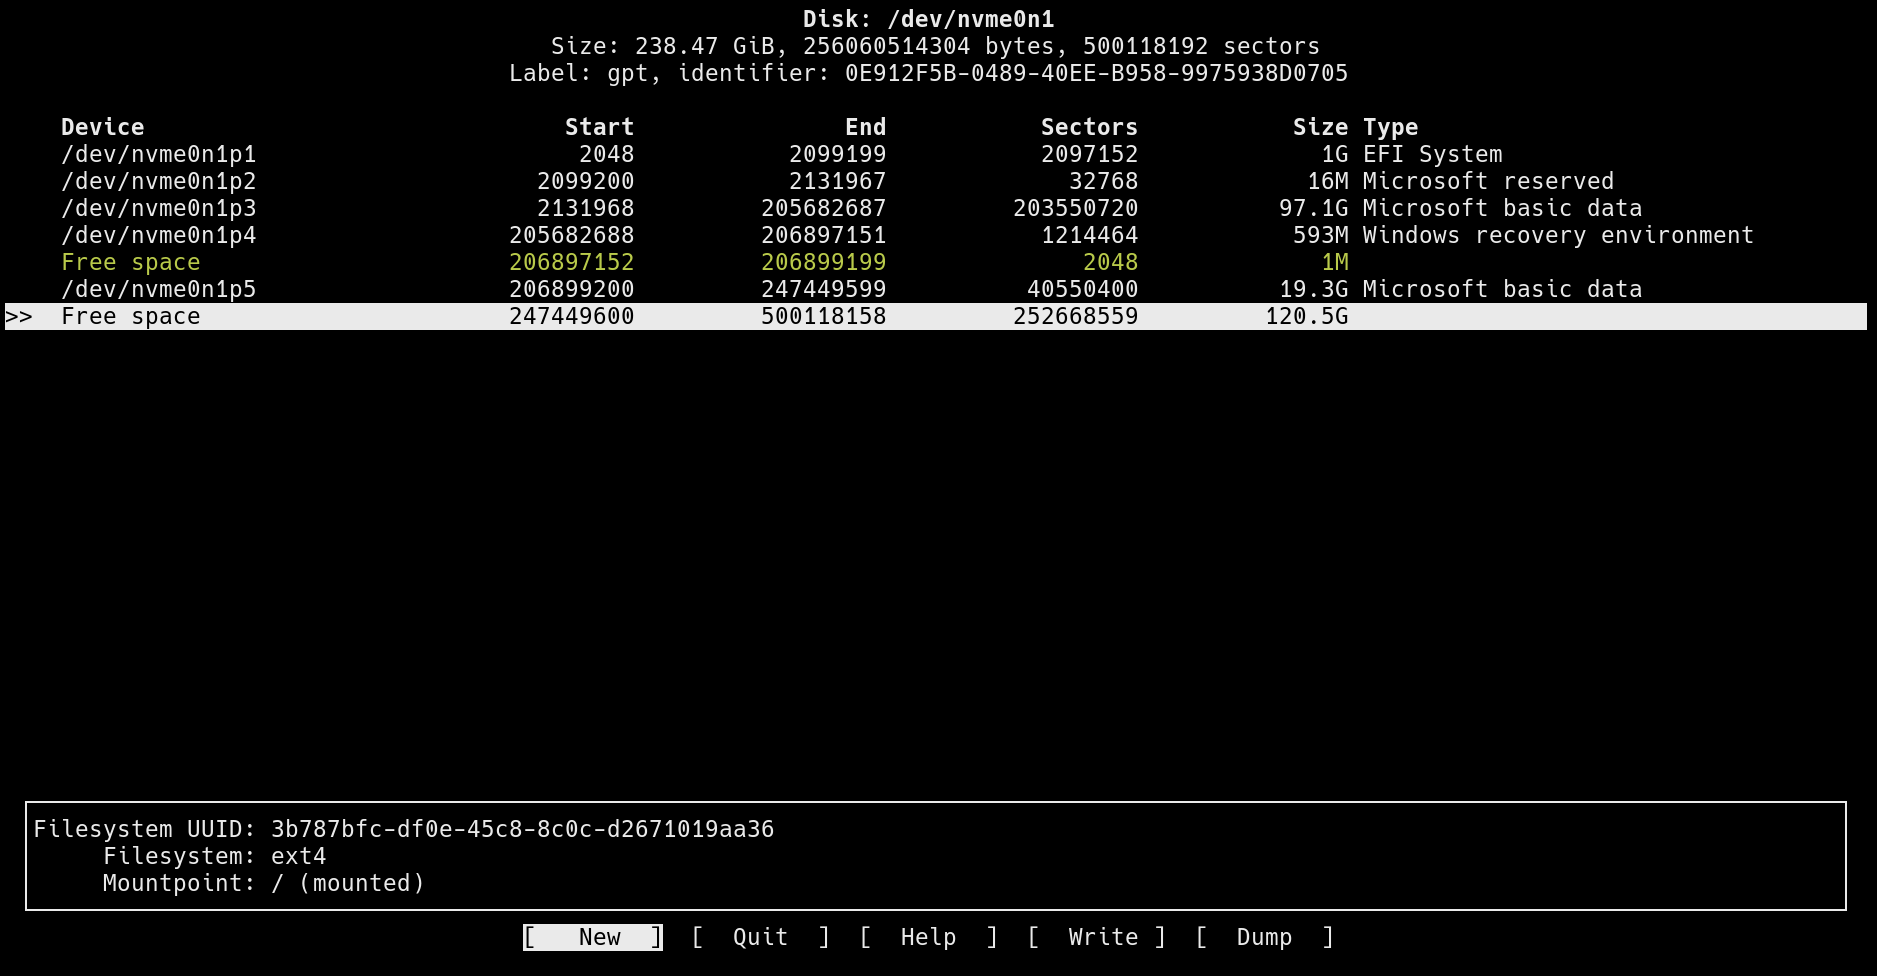
Now use left/right arrow keys to select new and press enter to create a new partition with the remaining space. After you are done partitioning select the Write button and write the changes to disk and Quit cfdisk.
Now the partition should be listed when you run lsblk again.
(Important: you could also use fdisk to create a partition, just make sure to not format the EFI parittion or touch the other partitions)
After creating the root partition, we need to format it with a filesystem type -- I'll make it an ext4 partition.
Run mkfs.ext4 to format the partition with the ext4 filesystem -
$ mkfs.ext4 /dev/nvme0n1p6
(replace nvme0n1p6 with your root partition name)
We could also create a swap partition here if needed, however, a swapfile is usually the better option.
Mount the file systems
The base system is installed on /mnt, which is a mount point that exists in the Arch USB. We'll mount /mnt to the root partition and create a new directory /mnt/boot in the USB which has the boot partition mounted to it.
You could also use a different path for mounting boot directory. If you do, change it in grub installation command later as well.
Mount the root partition (replace nvme0n1p6 with your root partition) to /mnt
$ mount /dev/nvme0n1p6 /mnt
Mount the boot partition (the one we created in windows, nvme0n1p1 in my case)
$ mount --mkdir /dev/nvme0n1p1 /mnt/boot
Installation
Mirrors
Synchronize the package databases and update the keyring (sometimes keyring can be a issue if the archiso is very old):
$ pacman -Syy archlinux-keyring
Arch linux packages are installed from mirrors defined in /etc/pacman.d/mirrorlist, if the download speed in the above command was slow, it could be an issue related to the mirrors.
We can fix that by updating the mirrors, which you can do either manually or using reflector to automatically update the mirrors.
Install reflector with pacman:
$ pacman -Sy reflector
Backup the default mirrolist:
$ cp /etc/pacman.d/mirrorlist /etc/pacman.d/mirrorlist.bak
Get the latest 6 mirrors sorted by speed and save using reflector:
$ reflector --latest 6 --sort rate --download-timeout 100 --save /etc/pacman.d/mirrorlist
You can also add the -c <Country> flag if you want to, which will only select mirrors from
Base Install
Use the pacstrap script to install the base and linux packages:
$ pacstrap /mnt base linux linux-firmware base-devel neovim
The above command installs the base group, linux and linux firmware, packages necessary for building and development (base-devel) and neovim (CLI text editor) on the system.
Fstab
Fstab (filesystem table) located in /etc/fstab is a file that keeps track of all the partitions that a distro requires to boot along with their mountpoints.
Generate the fstab file from /mnt and append into /mnt/etc/fstab :
$ genfstab -U /mnt >> /mnt/etc/fstab
Chroot and other configuration
After installing the base group and generating the fstab, we will chroot into the Arch installation and configure some other things like the locale, timezone and bootloader.
Enter the installation using:
$ arch-chroot /mnt
After entering the installation the prompt should change as now you are no longer in the live USB, although installation is not finished yet, you wouldn't be able to boot until you have setup a bootloader. At this point Arch is technically installed. If you make a mistake or your machine forcefully powers off for some reason, you can continue the installation later. All you need to do is boot into live USB and mount and chroot like before. This can also be handy if you break the installation, since you can always fix the system by just chrooting into it from the live USB.
Update timezone (replace Region/City with your timezone):
[root@archiso]$ ln -sf /usr/share/zoneinfo/Region/City /etc/localtime
(you can use $ ls /usr/share/zoneinfo to find your region and city in case you're unsure)
Sync system clock to hardware clock:
[root@archiso]$ hwclock --systohc
Generate locale:
[root@archiso]$ locale-gen
Set the LANG variable in the locale.conf file:
[root@archiso]$ echo "LANG=en_US.UTF-8" >> /etc/locale.conf
hostname is a unique name to identify a machine on a network.
Create hostname file and add a hostname:
[root@archiso]$ echo "my-machine" >> /etc/hostname
Give root user a password:
[root@archiso]$ passwd
Follow the instructions and type a password.
Bootloader
Install the bootloader and networking packages:
[root@archiso]$ pacman -S grub efibootmgr os-prober networkmanager wireless_tools wpa_supplicant
grub is the bootloader.
os-prober package is used to detect the other installed operating systems and create their entries in grub.
efibootmgr is a userspace application used to modify the UEFI Boot Manager.
Install grub:
[root@archiso]$ grub-install --target=x86_64-efi --efi-directory=/boot --bootloader-id=GRUB
This installs the grub on /boot which is mounted on nvme0n1p1, our boot partition. If you chose a different mount point for boot partition, replace /boot with your mountpoint (without /mnt).
Enable os-prober on grub:
By default, os-prober is disabled in the grub config, hence it won't detect Windows. When generating config in next step, you'll get a warning saying os-prober is disabled. Simply uncomment/add GRUB_DISABLE_OS_PROBER=false in /etc/default/grub.
Generate grub config:
[root@archiso] grub-mkconfig -o /boot/grub/grub.cfg
Here grub will generate the config and write it to grub.cfg. Make sure Linux and Windows both are detected here.
Enable network manager service:
[root@archiso] systemctl enable NetworkManager && exit
Reboot
exit from the chroot, unmount /mnt, and restart the system
$ umount -R /mnt && reboot
If everything went well, then you should now see a grub window on boot.
Post Installation
We haven't created a user yet, so login with root user and then create a user :
User (with superuser)
Create user with wheel gropu (replace username with name)
[root@alok-pc]$ usermod -mG wheel username
Give a password to user:
[root@alok-pc]$ passwd username
Add user to sudoers file:
Uncomment %wheel ALL=(ALL:ALL) ALL from
[root@alok-pc]$ EDITOR=nvim visudo
save and exit.
Congratulations -- you're now the owner of a dual-booting machine! So far!